"As for me and my house, we will serve the Lord." Joshua 24:15
Showing posts with label eco-conscious. Show all posts

5.04.2011

Finally, some sewing!

Well, I dusted off my sewing machine after a long, unanticipated break. All because I saw the cutest little zippered pouches in the Edgefield gift shop. You just never know where inspiration will be found! I've been searching high and low for the last couple months. Guess it had to find me. Edgefield is so fab, by the way. I know I've said that before, but if you are local and haven't been, you must. On a sunny day.

Anyway, these pouches I saw were made of several gorgeous fabrics, with a gusseted bottom, zippered opening, and some embellishments on the front- mostly little appliqued felt pieces and fun buttons. Super cute. I kept going back to look at them, thinking I must attempt making one.
Here is my interpretation:


I forgot to take a pic of the inside, but it's lined in turquoise. I just love these colors together. I think it'll make a perfect little cosmetics bag. 

So a while back I attempted to make a simple little reusable snack pouch lined in ripstop nylon (my original sandwich wraps were lined in PUL which apparently may not be food safe... oops). It turned out ok, but I've been meaning to make more and try and perfect the pattern. Because I love using these! I've always got snacks for the boys stashed in my bag, and this way I'm not constantly throwing away plastic zipper bags!


These are a tad girly for my boys... but I'm the one who has to carry them, right? They may as well be pretty. The nylon lining makes it easy to brush out crumbs, and when they get really messy I just throw them in the wash. I'm hoping the bigger one will be a good size for sandwiches. Picnic season is upon us!


I got a bit lazy at the end and didn't use pink thread for the bias tape on the small pouch. Really should have. Also I was out of the wider bais tape (1/2"?) and had to use the super narrow stuff... the wider would be so much easier to catch all the layers. If I can manage to streamline this little project, I'll attempt to post a pattern/tutorial so you can make your own! They are super simple. 

5.02.2011

upcycled baskets

Can I just say I love Family Fun magazine? One of my fabulous aunties gets an extra copy at her office and always brings it to me. Here is a great upcycling craft I found in the March issue: weaving cut up strips of t-shirts into baskets! Love it! The original tutorial is for a rug made of t-shirt strips using a hula hoop for a loom. I was fresh out of hula hoops, so I skipped on to the tutorial for making smaller baskets using an embroidery hoop. 


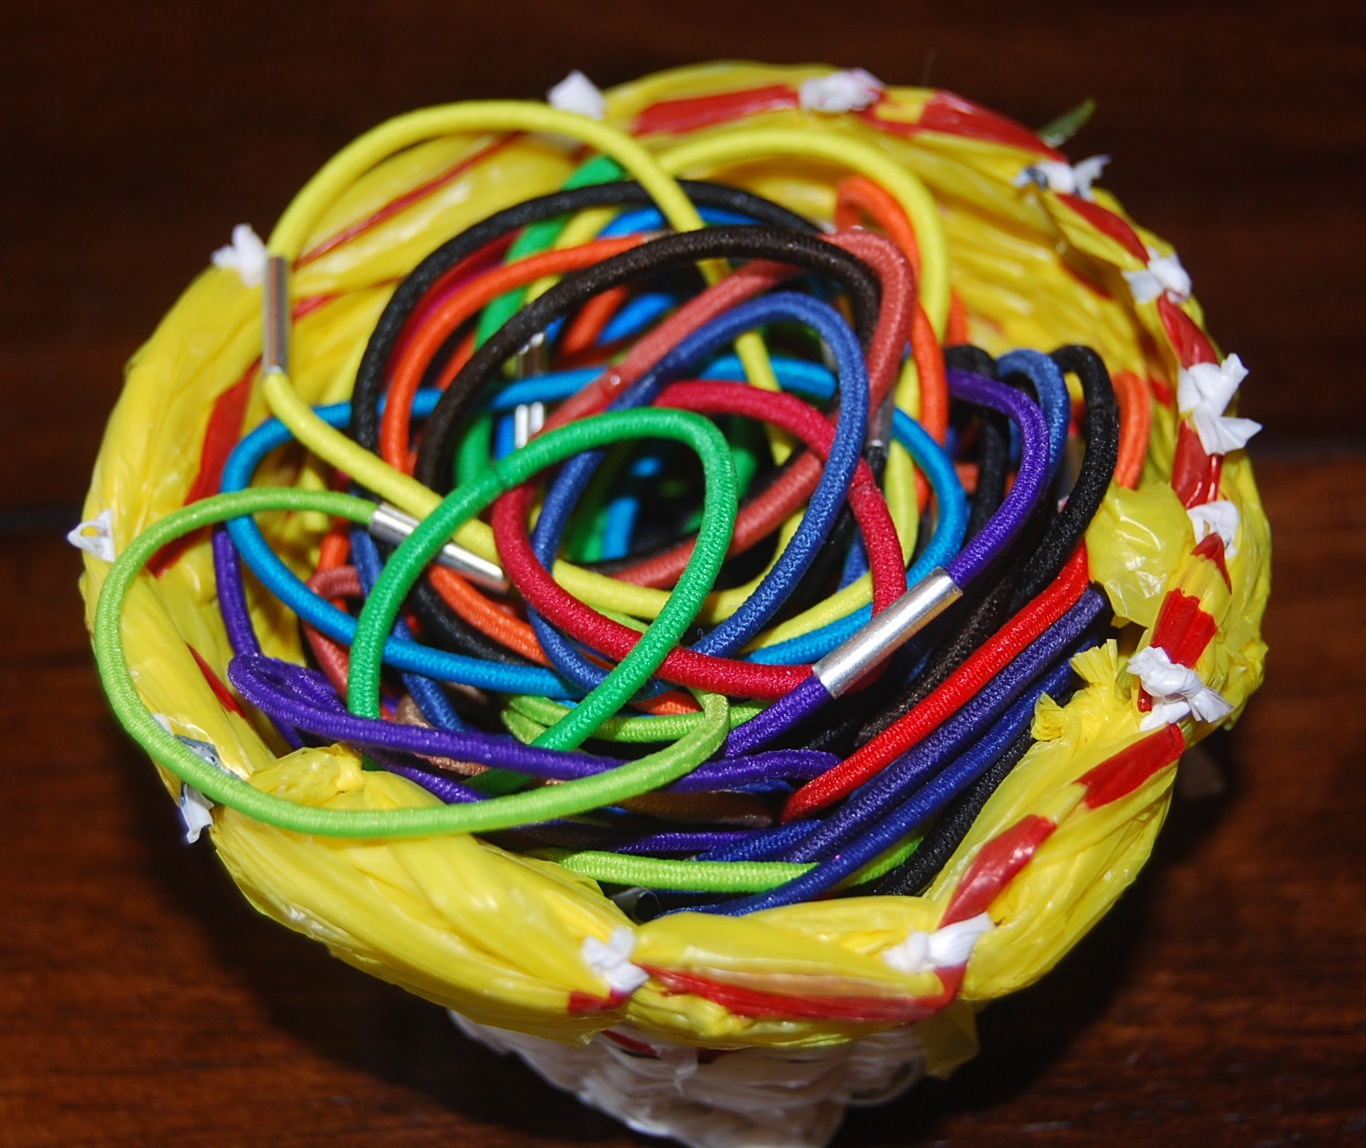
Here is my first basket! I used one 4T undershirt, a 4T t-shirt, and one of my own tees. For this size (3" tall by about 4" at widest point) I used a 14" embroidery hoop and still had some strips left over. I loved this project so much that I attempted to do the same thing with cut up strips of plastic grocery bags. 


I love the idea of repurposing them! I always use my own shopping bags when grocery shopping, but hubby forgets... and I tend to forget at places like Target if I'm just stopping for a few things. I cut off the top handle portion and the very bottom and discarded those. The rest I cut into about 1 1/2" strips. 


I followed the same instructions, and ended up using about 5 or 6 bags for this little basket. 


It's much tinier than my t-shirt basket, about 2" tall by 3" in diameter. 


Perfect for holding the elastics I use for my coffee cozies! 
I'd really like to try a fun, colorful rug for the boys' playroom if I can find a bargain hula hoop. Again, here are the links for the tutorials if you'd like to weave your own:


12.30.2010

Catching up

Wow.
I really didn't intend to take a month-long break from blogging! Is Christmastime crazy or what?
We tried to keep Christmas simple this year... Cut back a bit, keep it low stress, enjoy some unrushed family time. Somehow the simple never really happens though.
I did have a lot of fun sewing up a few gifts, however! I made a (Portland) Trail Blazers themed quilt for my brother, who's a huge fan.


I found the idea for this quilt design from a link on the make happy facebook page. You can find a free pattern pdf over at Made By Rae.


Beckham had to check it out, see if Uncle would like it.


I cut up a Blazer jersey for some of the accent pieces. Hubby's idea. Love it.


This is an insulated lunch bag I made for my mom. Forgot to take a pic before I gave it to her, but this is one she sent me of it in use!


And a cute little messenger bag for my sweet little cousin. For this one I used a free tutorial from mmmcrafts, click here.


Cute lining fabric! This was really fun to make!

This is Ty's new art apron:


I am loving this Dr. Seuss fabric. I made lots of different sized pockets for different little crafty things.

A couple girlfriends asked if I could make some doll carriers for their daughters, so here is what I came up for them. This was a challenge! But I enjoyed it!


Finally got to try my hand at some little rag quilts!


All these projects kept me busy! Plus I made a sort of crazy, last-minute decision to do a couple holiday bazaars this season. Literally had 3 weeks to prepare. But after one I was hooked! Did another one a couple weeks later. Stuff sold! This was very exciting and humbling for me! And something way cool happened at the second bazaar.... The owner of a local coffee shop stopped by my booth and asked if I would like to sell my coffee cozies in her shop!


This is one of the Christmas ones I made.


Fuzzy zebra...


...and of course, Oregon Ducks!

I brought 15 in to her the first day, and by the following day all but 4 had sold! So I brought 12 more, which sold in a day or two. All of a sudden I could barely keep up with demand! All my spare time was spent sewing these silly things! I knew the Christmas rush was a lot of it, and luckily sales have slowed a bit now that it's over. But I have another shop in town interested in selling them now (thanks Becky!), so I'm really excited about the potential. 

So that's what I've been up to! I've missed you all, and hope everyone had a wonderful Christmas! I know we did. Very busy but super fun. I'm looking forward to the new year ahead and all the promise it holds. 
Check back soon, I want to show you some of my cool new Christmas toys!

11.30.2010

A simple invention that saves my sanity

Here he is: The Messiest Baby In All The Land


Cute, right?


But my floors after every meal and snack?
Not so cute. And this was a particularly clean day.


So I bought a yard of PUL (polyurethane laminate), which is a waterproof fabric often used in cloth diapers. It's awesome stuff. Slick on one side so you can wipe it off. Waterproof so liquids don't soak through. Soft and fold-able so I can stash it in my diaper bag for meals out. Plus, machine washable... a necessity! And comes in cute designs and colors. I just got plain old white since it spends a fair amount of time on my dining room floor. Too bad they don't have wood color. 


I just rolled up and hemmed the edges and it makes the perfect reusable high chair mat. I've never seen these in stores, only the disposable ones... and do we really need more things to add to landfills? 


maybe I need to make a bigger one...

This thing saves my life. Keeps me from vacuuming three times a day. Mopping too. Why does this kid insist on throwing absolutely everything on the floor? And with force! Even supposedly spill-proof sippy cups spill the milk if thrown hard enough. And Beckham has it all figured out. 
I just lay this down pre-meal, then shake it off outside after (feed the birds!).  I wipe it off, then use it again. When it gets really messy I just throw it in the washer and dryer. 

It also makes a great play-doh mat for Ty! 


11.12.2010

Laundry Detergent Challenge: Recipe

Alrighty folks, here is the promised recipe for the dry laundry detergent (click here to read more about this challenge). I just finished making a batch myself and it was super easy. Except for the cramped hand from all the grating!!

Gather your ingredients:


Fels Naptha soap
Borax
Washing Soda


Grate the soap using a fine grater


Ugh, taking a break... 


Done!
Then pour it into your container.
(the recipe will yield about 4 cups, so choose one large enough)


Add one cup washing soda...


And one cup borax...


Then shake it up!


My borax was a bit clumpy, so I had to stir it with a fork.


For a front-loading washer, you would want to use about 1 Tablespoon per load, and for a top-loader you would use 2 Tablespoons. I tried to make a little measuring cup to put inside, but couldn't find my sharpie!


So I wrote the instructions on the lid, and also added the recipe. Since these donations will go to struggling families, maybe knowing how to make more of this inexpensive homemade detergent can benefit them in the future.

Ok, simple as that!! I've only made this one batch so far, but have lots of my borax and washing soda left, so I just need to go pick up a few more bars of Fels Naptha to make more. Then I will be taking it to My Father's House! Can't wait. 


Sooo, about that giveaway...
Here are the details:

Comment on this post once you've made your detergent and donated it. (I'll link to it on my sidebar so you can find it again later)

Become a Sleepless in Sandy follower for an extra entry, just leave another comment telling me you've done so

Be sure to leave an email address where I can reach you if you win!

Contest will close on Thanksgiving, November 25th, at 6pm (that gives you almost 2 weeks, you can do it!)

Winner will be chosen at random on Friday, November 26th 
I'll email the winner and post it here that afternoon!

Winner receives:
4 movie tickets to Regal Cinemas 
and a reusable sandwich wrap
Not to mention that warm fuzzy feeling and the know-how to make your own detergent!

11.10.2010

A fun challenge, and a GIVEAWAY!!!

Ok, I have a super fun thing to share today!

Let's call it a 'giving back' challenge:

I like to come up with ways to help those less fortunate, but usually can't afford to make big donations to the causes dear to my heart. So I have to get a bit creative. I used to be really on top of couponing, and got a lot of free and very cheap groceries and household items that I could donate, but I've been really slacking lately. Recently my husband mentioned a local organization called My Father's House, which is a family homeless shelter in Gresham, and apparently they are in great need of food and household product donations.
 They also need laundry detergent.
This got the wheels turning... I asked him to verify if they could accept homemade detergent and they can!!
That I can do!!
So, here is my plan:

Several of my friends, some of Mike's co-workers and I are purchasing the ingredients for the dry laundry detergent recipe I originally found on My Frugal Lifestyle. I've only made the liquid myself, but have wanted to try the dry- and I think it would be easier for this purpose. Then in the next week or so, we all will be making the detergent (as few or as many batches as we can!) and taking it to the donation center at this local charity.

Here is my challenge to you:
Let's all do it!!
Go pick up these three ingredients at your local grocery store, plus a container with a lid to put it in (like a food storage container):
20 Mule Team Borax (one box is enough for about 9 batches)
Arm and Hammer Super Washing Soda (1 box is enough for about 6 batches)
Fels Naptha soap (1 bar per batch, so buy extra if you want to make more)

I've found these at both Winco and Fred Meyer (Kroger), so hopefully most grocery stores will carry them also.

The great thing about this is it is soooo cheap! One batch costs under $2, and will yield around 64 loads, or even more in a front-loading machine. That's around 3 cents (or less) per load. So much cheaper than store-bought! I can donate a lot more homemade detergent than I could if I had to go buy it.

So, get your ingredients ready, and I'll be reposting the recipe in the next couple days. Then make up a few batches and bring them to a shelter or organization near you (but be sure they can accept homemade).

Here's the fun part: come back here (I'll add a link to my sidebar) and comment to let me know you participated, and you'll be entered to win my first ever giveaway!!! 4 Premier Movie Tickets for Regal Cinemas, PLUS a crafty creation of my choosing!

I'm super excited about this! Let's do a small thing to help these families and have a bit of fun at the same time.

I'll post more details about the giveaway when I post the recipe, so be sure to check back soon!

Edit: Click here for giveaway details and detergent recipe!

10.04.2010

Picnic bag and sandwich wraps

I've seen these reusable sandwich wraps on etsy before and always wanted some-- what a great way to save on foil or baggie use! So I recently decided it would be pretty easy to make my own. I looked at a bunch of different ones and experimented with shapes a bit...


This one is just a rounded rectangle.


And this one has angled corners. They both work equally well... I think the angled corners look more finished, but the rounded ones were way easier to do!


So the outside is just lightweight cotton fabric, and the lining is waterproof laminate fabric. That way you can just wipe it clean to use again, or if it gets really messy you can throw the whole thing in the washer and dryer. 


Plus they are so cute! They just wrap right up and secure with an elastic loop and decorative button.
I am loving these! We recently went on a long weekend trip, just us four, and made tons of little picnics. I used these over and over the whole time-- not a single baggie wasted! I can't wait to make a bunch more, they are so easy!

And in preparation for the above mentioned trip, I decided to make a nice big insulated picnic bag for us to pack food and snacks. We did lots of bike rides and walks and hanging by the pool, so this came in so handy! And again, super cute!


It's basically just a large, drawstring top purse...


But lined with the same waterproof fabric, and with a hidden layer of insulated batting.
I also added a couple straps to tie a bottle of wine water.


Isn't this little embellishment cute? So easy to make with a fun little tool thing I got at the craft store. :)


Fun projects! I'm also working on perfecting some reusable snack baggies, but they have a ways to go. I'll post 'em when I'm finished! 

9.16.2010

Luscious LUSH goodness

On my recent birthday, after an awesome breakfast out, my sweet husband took me to my favorite shop to pick out some bath goodies.

You can actually smell Lush before you see it. I'm not even joking. A good block or so down the street you catch this sweet, fresh, indescribable scent. And then you walk into a shop like no other.
Rows and rows of colorful bath bombs... chunks of beautiful, freshly cut soaps wrapped up like cheese in a deli... bars of solid shampoo... bowls of fresh face masks on ice...


Most of the products are "naked"- no packaging at all. Most are preservative-free. Most have stickers with the date they were made, the date they expire, and a picture of the person(not machine)who proudly made the product.

All products are original and invented by Lush, truly handmade in small batches, vegetarian, and filled with gorgeous, mostly natural, often organic ingredients. Essential oils. Fresh fruits and vegetables. Herbs. No animal testing, of COURSE.

Love, love, love Lush.

I first discovered it on a trip to Whistler with my parents when I was 14 or 15. I was completely amazed and spent all my "trip money" on Lush products. I've been a devoted fan ever since, planning trips to Canada when possible... not specifically for a Lush visit, but the Lush visit was usually the highlight of the trip.

Enter my beloved Portland Lush shop!! I think it was around 2004 that it opened but I'm not positive... Regardless, it was a very happy day. Now I can visit anytime, buy just a few things... instead of saving up for months for the big annual Lush trip!

Here are my personal top ten Lush products:

1. Dorothy bubble bar
2. Honey Bee bath bomb
3. Butterball bath bomb
4. Creamy Candy bubble bar
5. Ma Bar bubble bar
6. Alkmaar soap
7. Rock Star soap
8. Aqua Marina face cleanser
9. Vanilla Puff dusting powder
10. Cupcake fresh face mask (not available online)

You must check it out. Our Portland store is at 708 NW 23rd. SO worth going if you enjoy a good bath. Or a shower.  :)

7.26.2010

Repurposed potting bench

I've been dying for a potting bench for a long time now... somewhere to organize all my gardening stuff. I wanted to get it out of the garage and closer to my backyard garden. It occurred to me recently that it didn't have to be an actual potting bench; those are expensive! So I started keeping my eyes open at garage sales for some sort of furniture piece that could be repurposed into a little organized potting space and just last week stumbled upon this!


It was only $5! I don't actually know what you call one of these... it's like a kitchen cart thing. It came with casters to roll around but I didn't use them.


Isn't it great?! I found some tiles leftover from our kitchen and made a little "floor". It has a great, shallow drawer that I put my packets of seeds into. 


Plenty of room for my plastic buckets that I use for weeding or harvesting in the late summer. A big 5-gallon tub filled with soil. Extra pots.


Oh, that lilac looks familiar, does it? I may have sprayed a few extra things yesterday while working on my teapot. Those are actually gerber baby puff containers. I kept saving them, thinking I could do something with them. They make cute little containers for garden tools!


And they make a great outdoor vase for a few sprigs of rosemary!


I also half-sprayed this plastic pot that a plant came in and repotted some succulents into it. Love it. Must buy more spray paint.


But what to do with the towel bar on my 'new' potting bench? I don't really need a towel out there... Any ideas?